Rock Editor
The rock editor allows for the editing and graphing (via this website) of the rock layer settings of the world through a GUI. This screen is divided into three tabs that focus on rock settings, the layer types, and layer definitions. Each tab is generally split into two sections: the display on the left, and the editor on the right. The layer types tab is unique in that, due to the underlying data structure, objects in its editor are technically still in the display and edits apply immediately to the rock layer settings.
Additionally, across the bottom of the screen there are four buttons
- Apply: Validate the current settings and display a message if an issue occurs or apply the settings to the generator and return to the preview screen
- Validate: Validate the current settings
- Graph: Generate a link to view the current settings on the rock graphing page on this website
- Cancel: Discard all edits to the settings and return to the preview screen
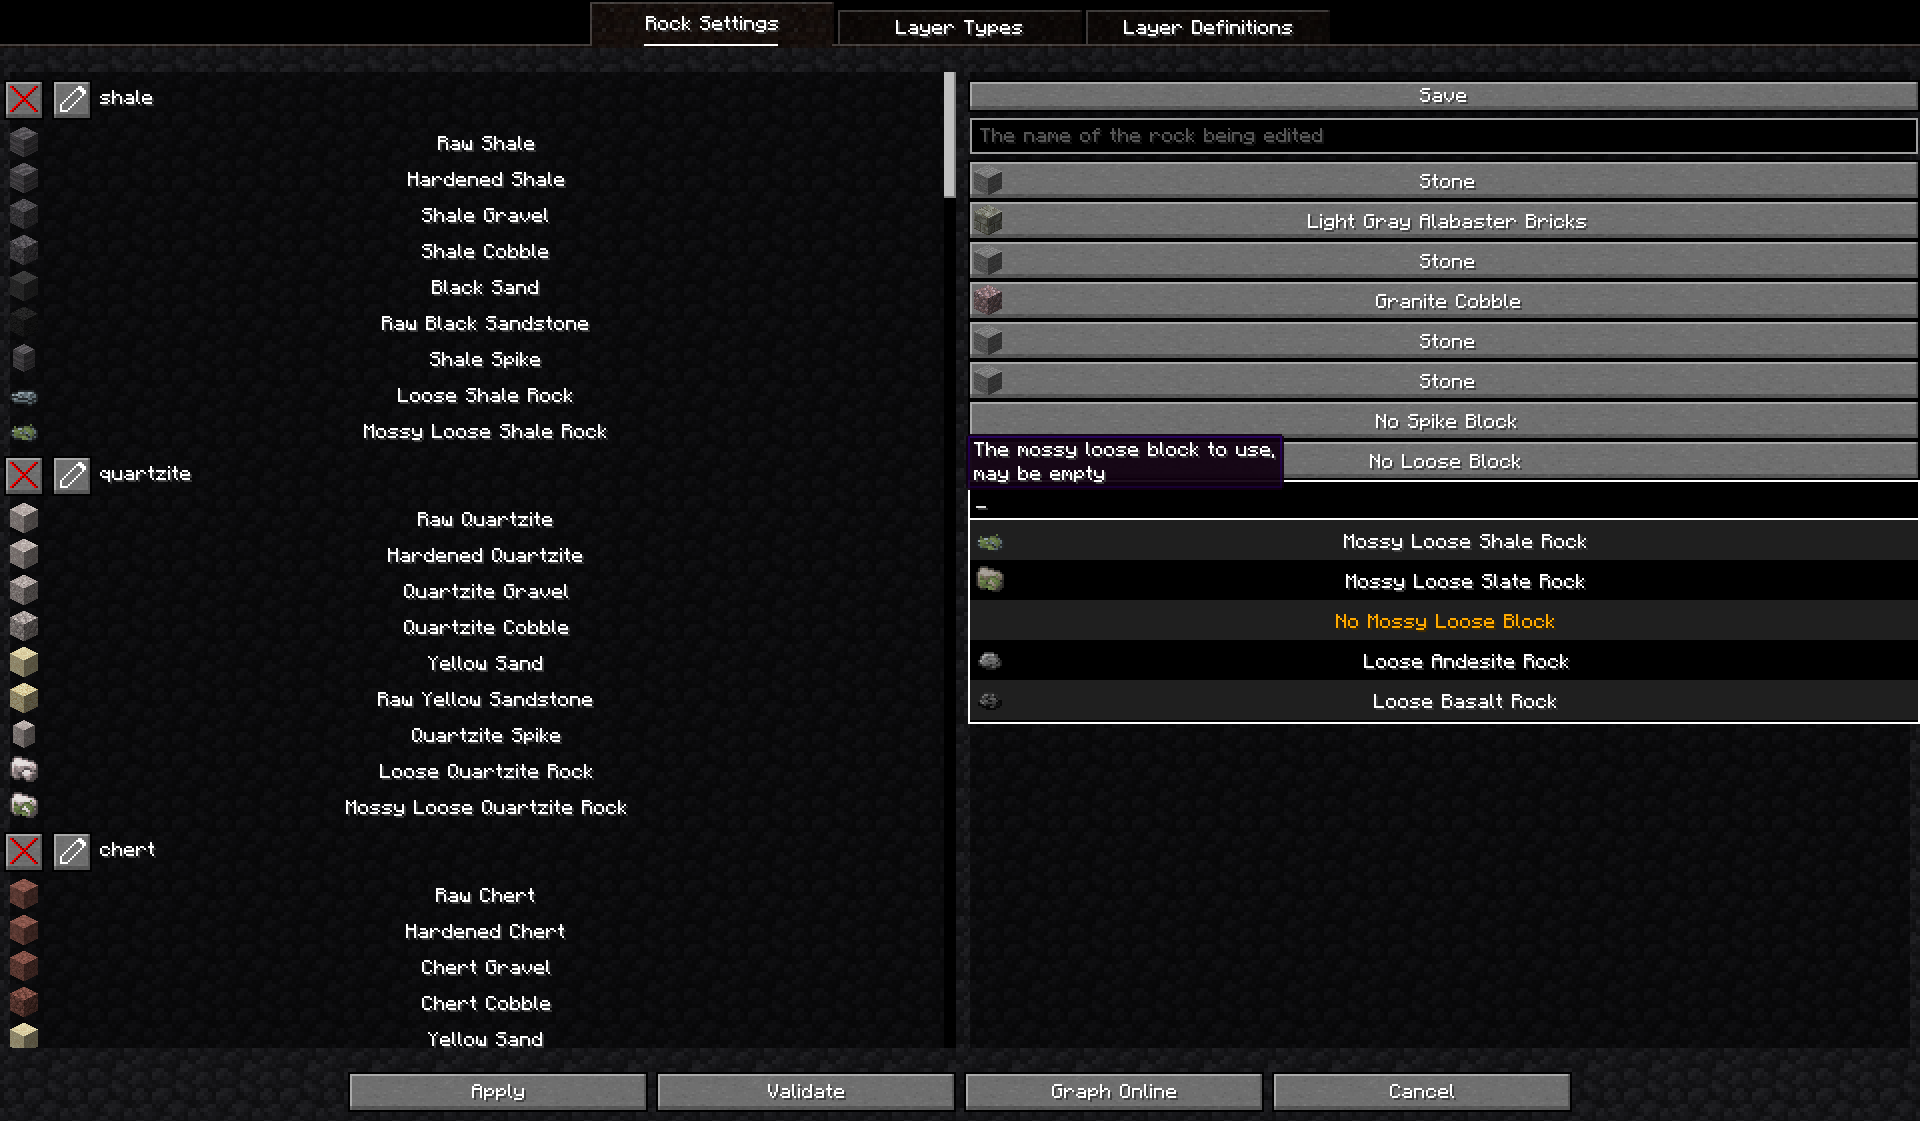
Rock Settings
This tab is for editing, removing, and adding rock settings.
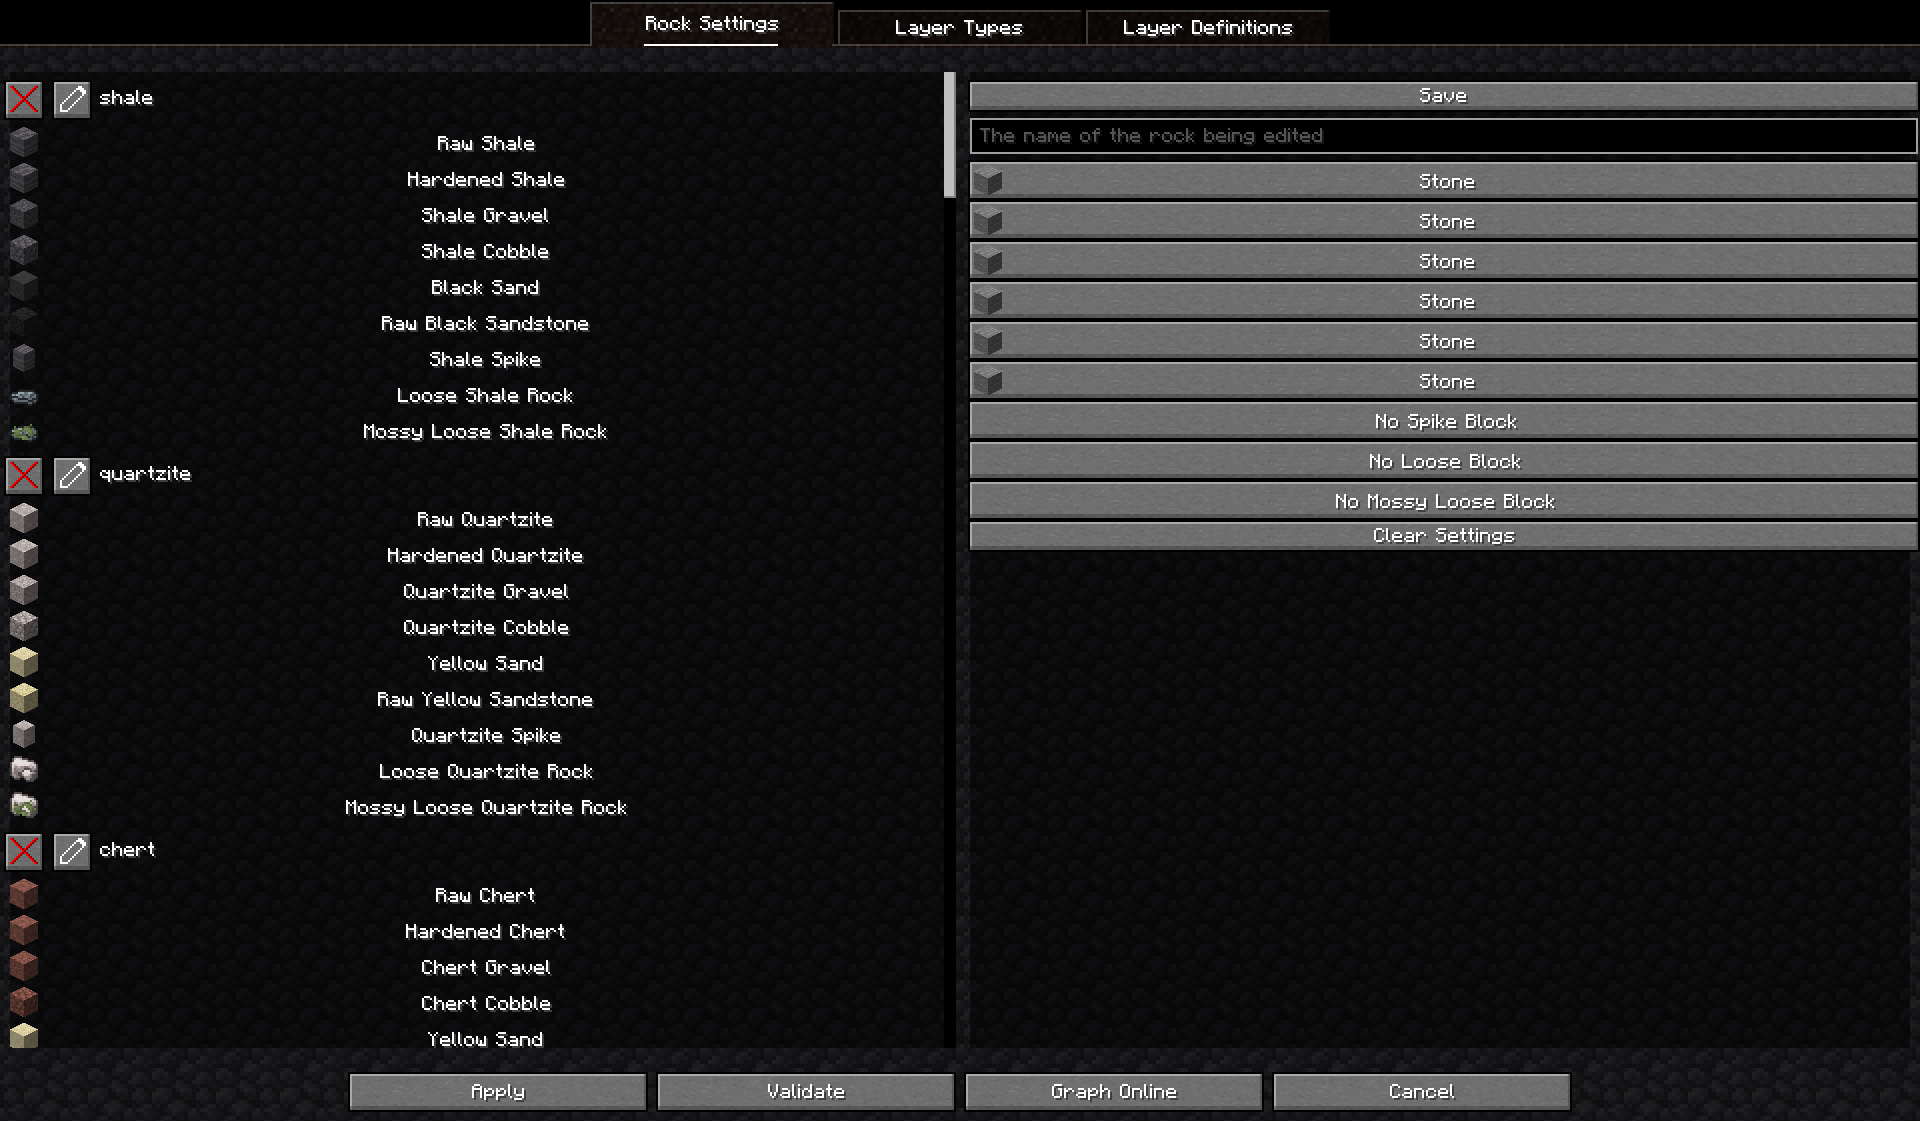
Each entry in the display consists of
- A remove button: Removes the rock setting
- An edit button: Moves the rock setting to the editor
- The name of the rock setting
- The blocks which define the rock settings
The editor is where the blocks of a rock setting can be changed and its name can be edited. The editor has:
- A save button: Validates the setting object and moves it left to the display and to the rock layer settings if valid.
- An edit box: The name of the setting, must not be blank
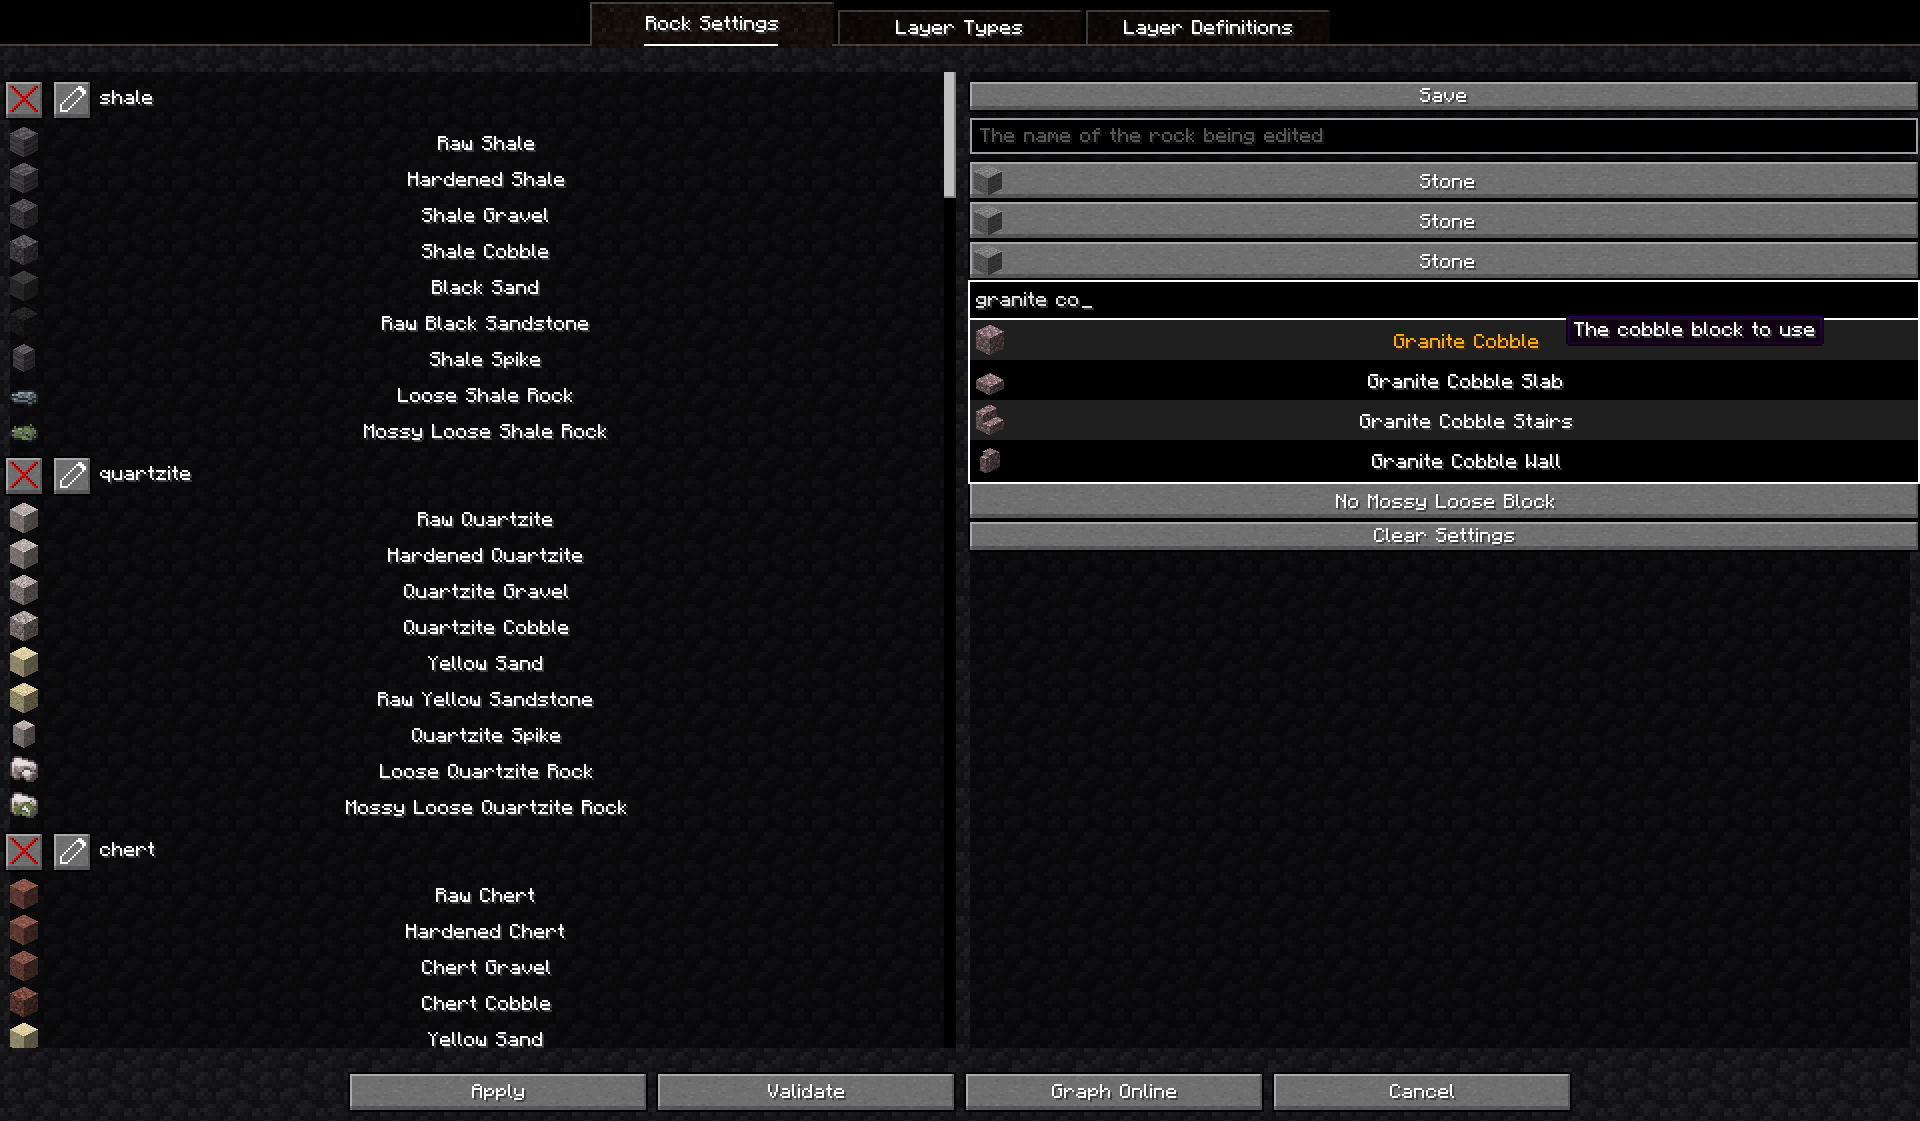
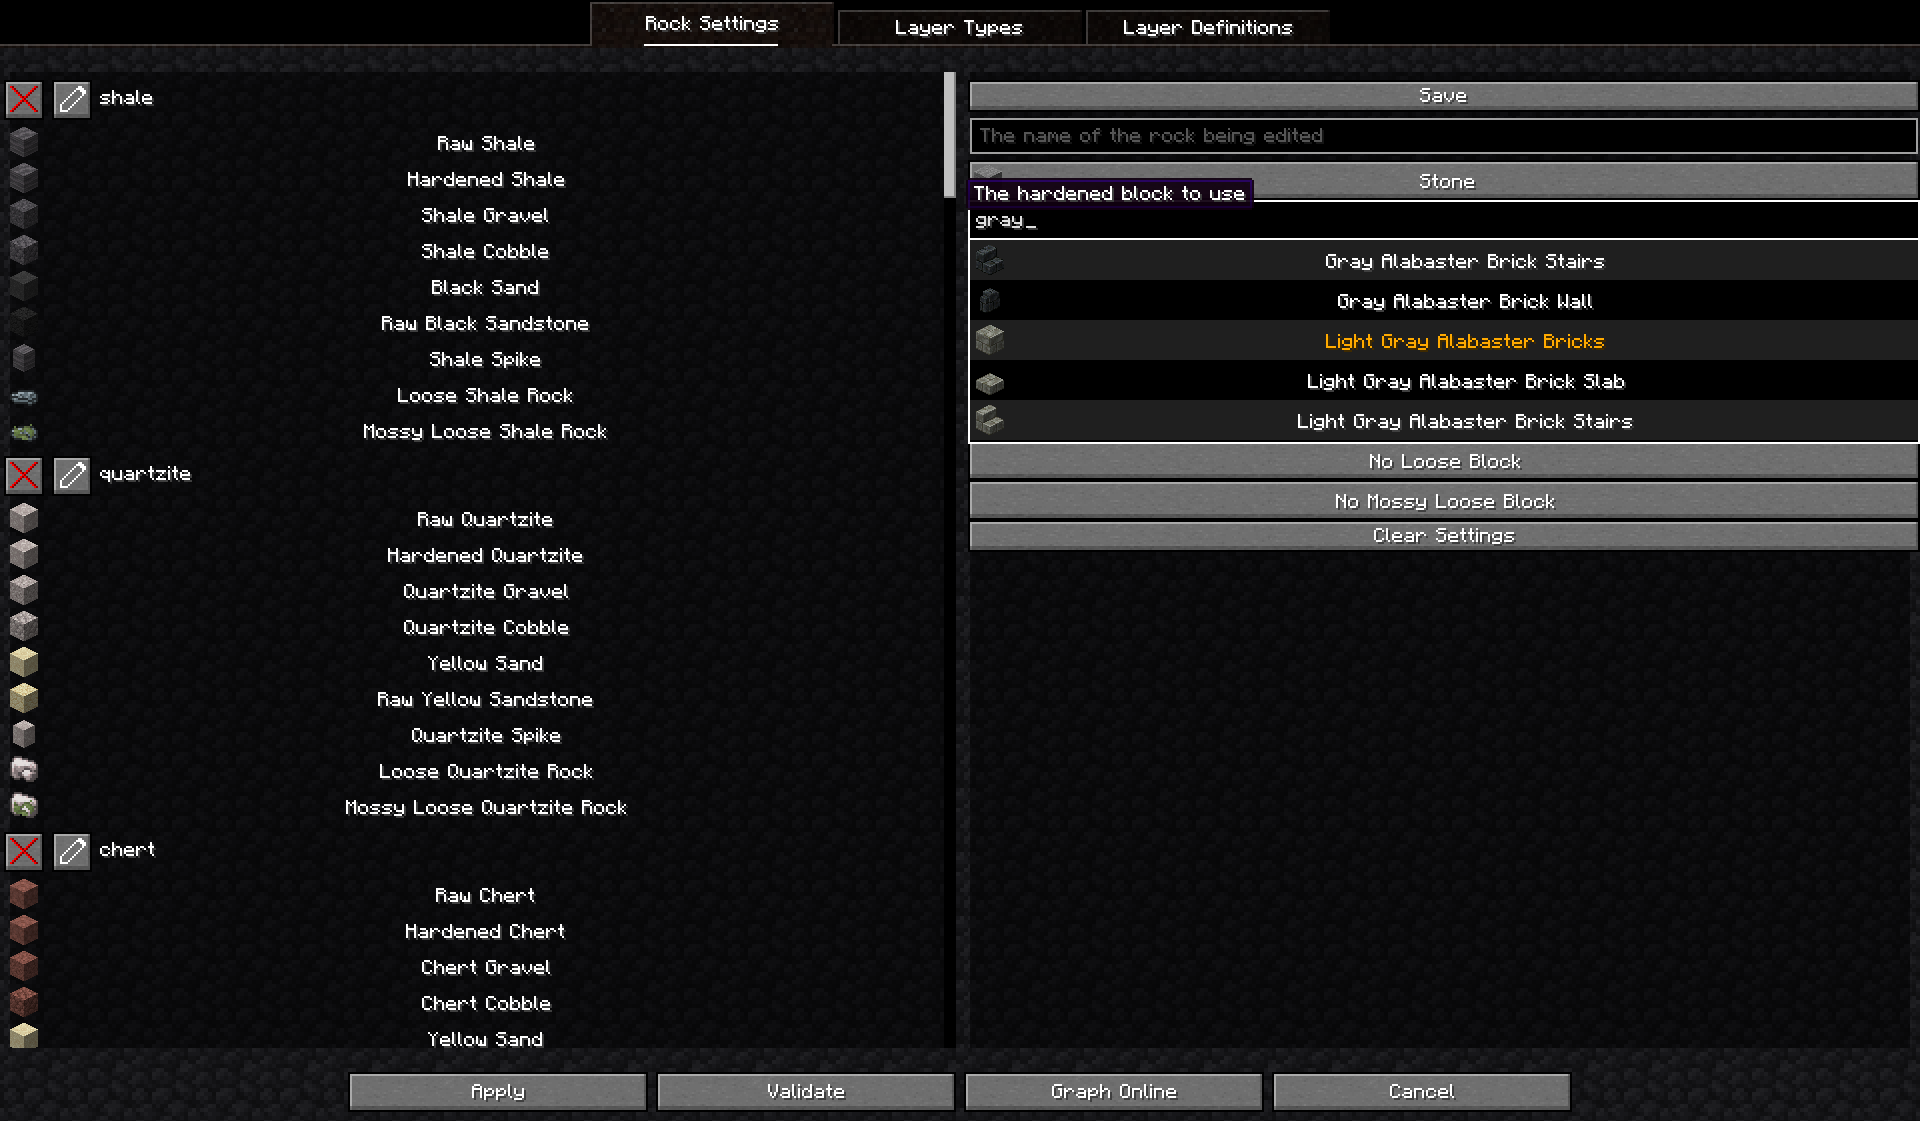
- 9 block selectors: The selectors for the blocks of the setting. Define, in order, the
raw,hardened,gravel,cobble,sand,sandstone,spike,loose, andmossy_looseblocks. Usage:- When not focused, each selector will display the icon and name of the selected block.
- When focused, the display will be replaced with a search bar and a ‘scrollable’ list of blocks, which will show at most five blocks. This displays the blocks matching the search.
- The list can be scrolled with the up and down arrows. Holding
altwill make the list scroll five at a time and holdingshiftwill force the focused element to change when using the arrow keys. - The block highlighted in gold is the one currently selected, this can be confirmed and added to the setting object with the
enterkey.
- A clear button: Resets the editor to the default state.
Layer Types
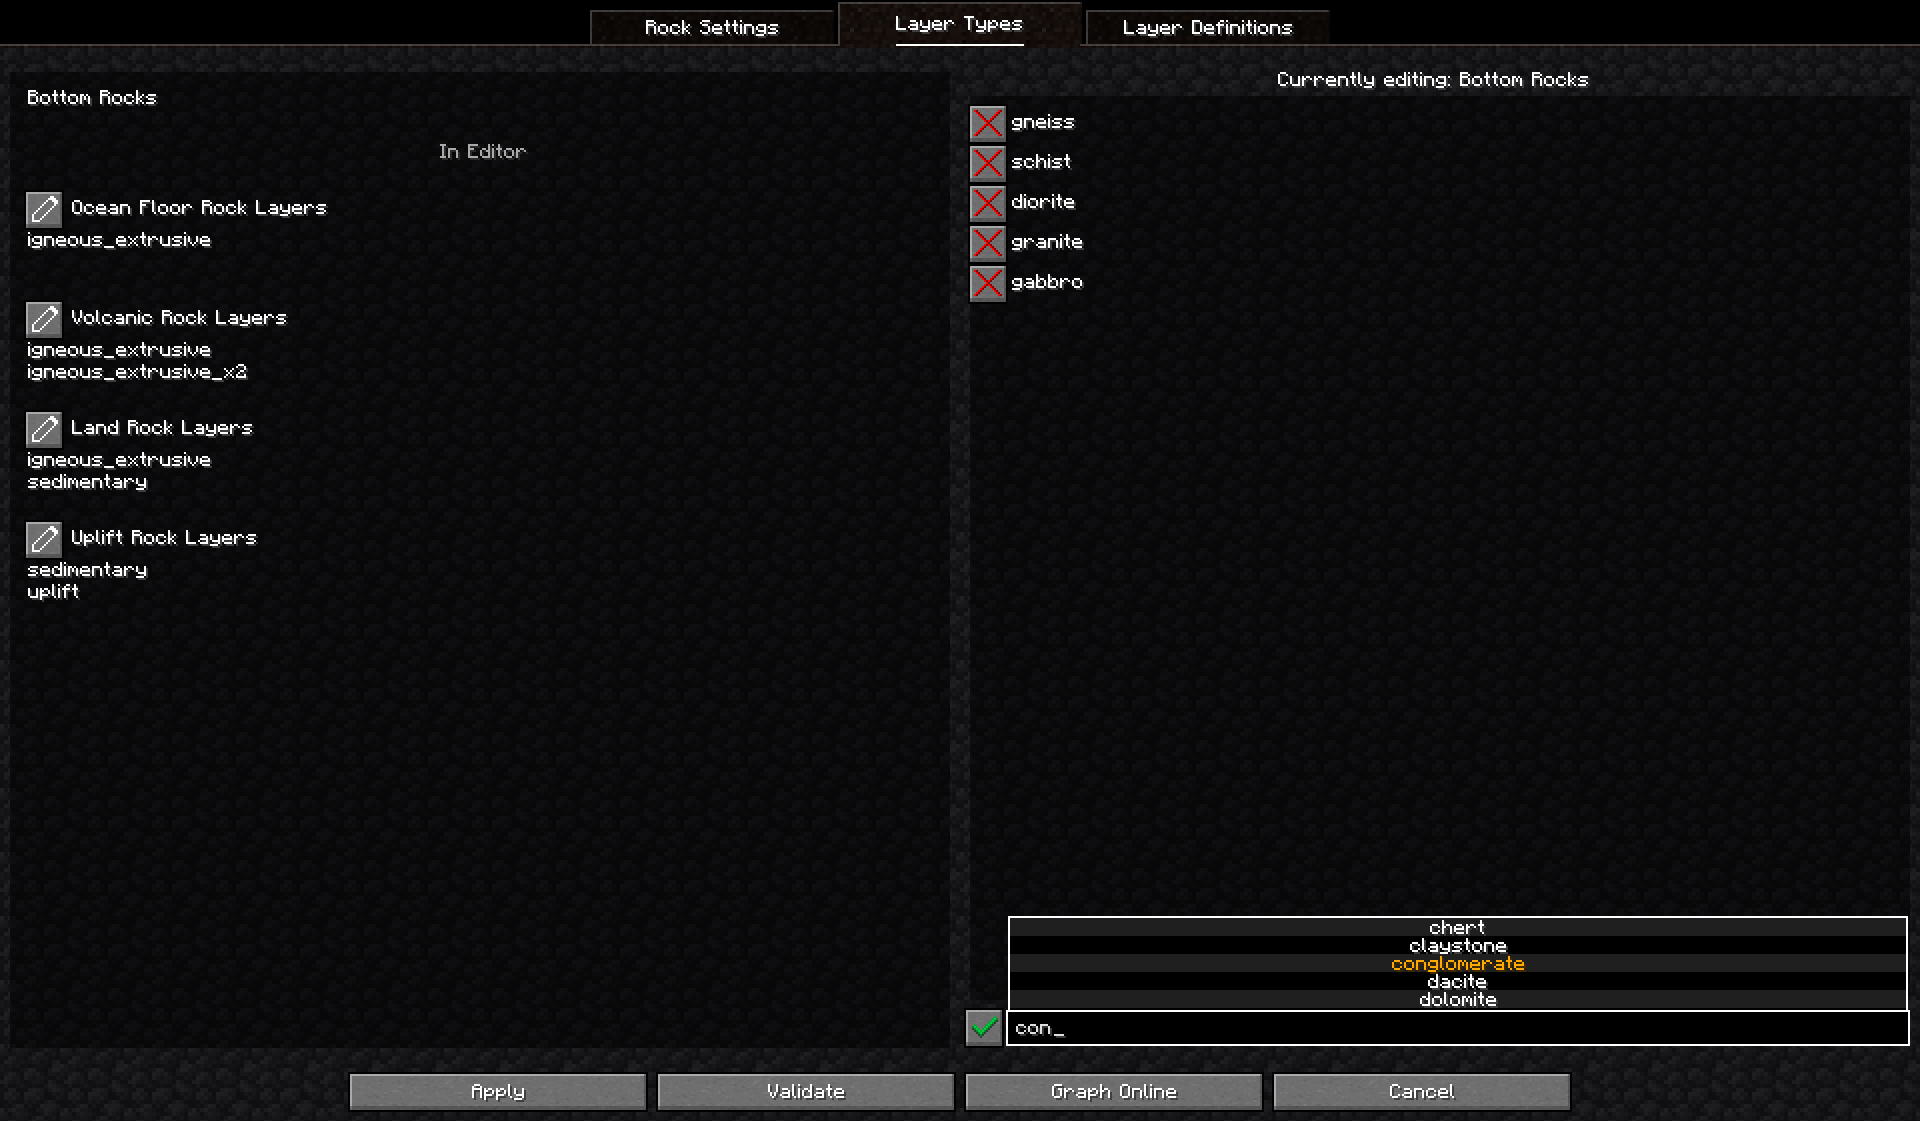
This tab is for editing which rock layers are in the ocean floor, volcanic, land, and uplift rock layer types and the rocks in the the bottom pseudo-layer.
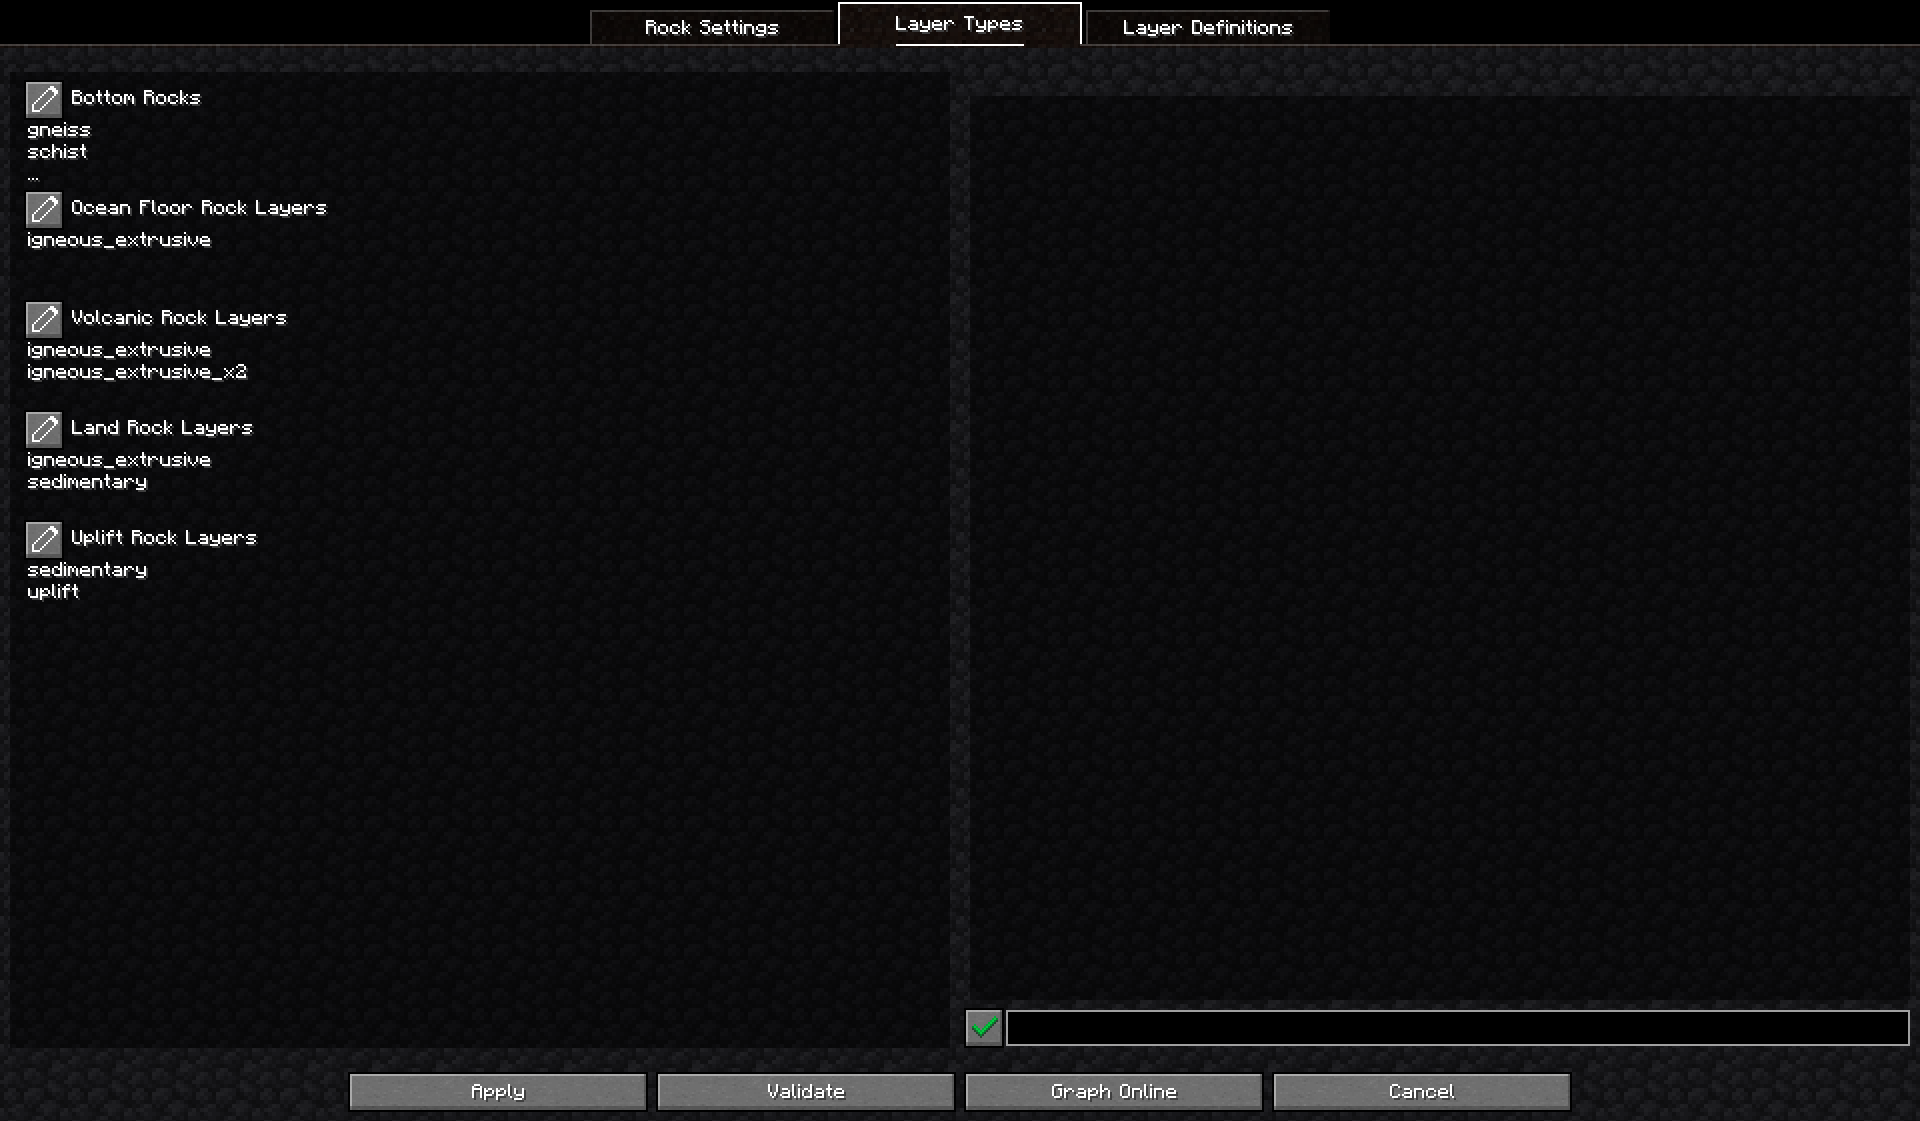
The display has five entries for the bottom rocks and the ocean floor, volcanic, land, and uplift rock layer types. Each entry has
- An edit button that moves the entry to the editor
- The title of the entry
- A list of up to three of the entry’s values. Entries with more than three values will display an ellipsis where the third value would typically be shown.
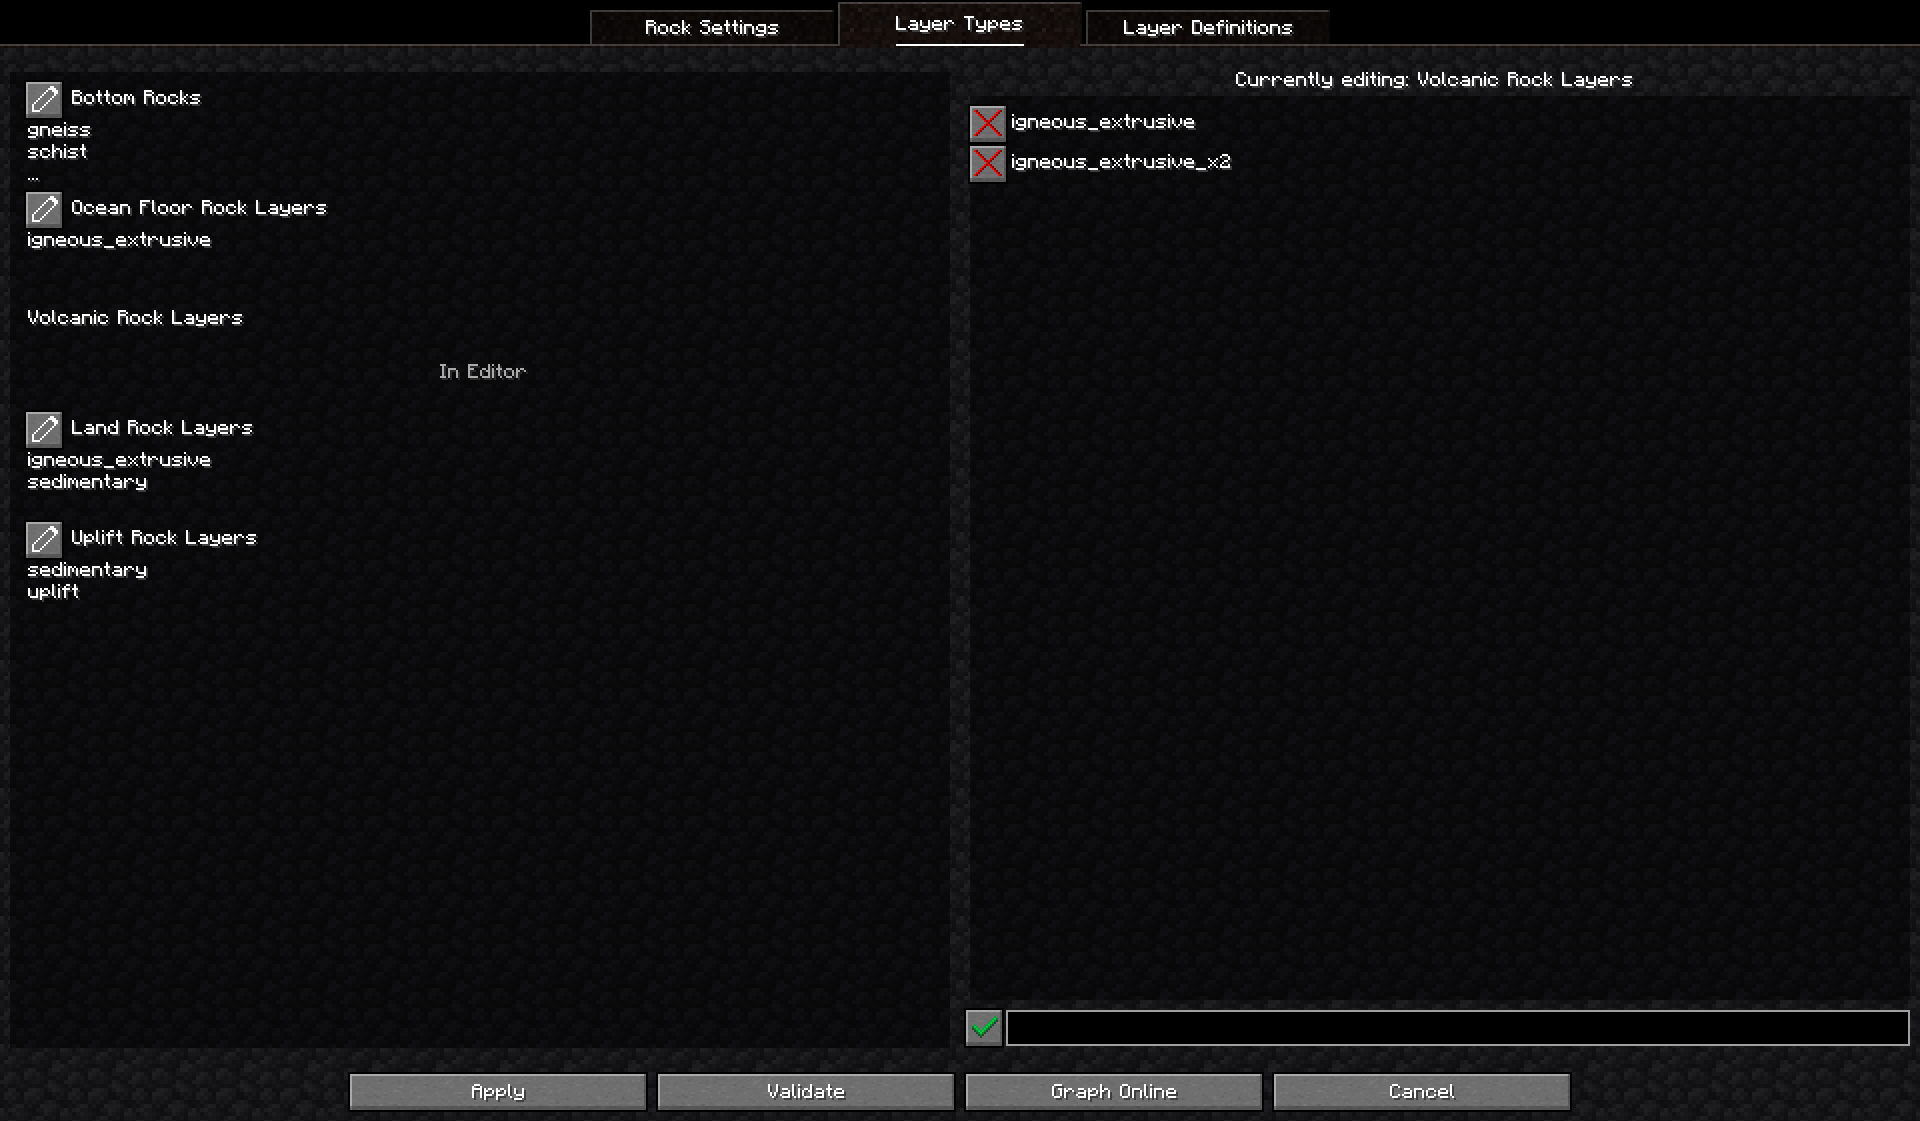
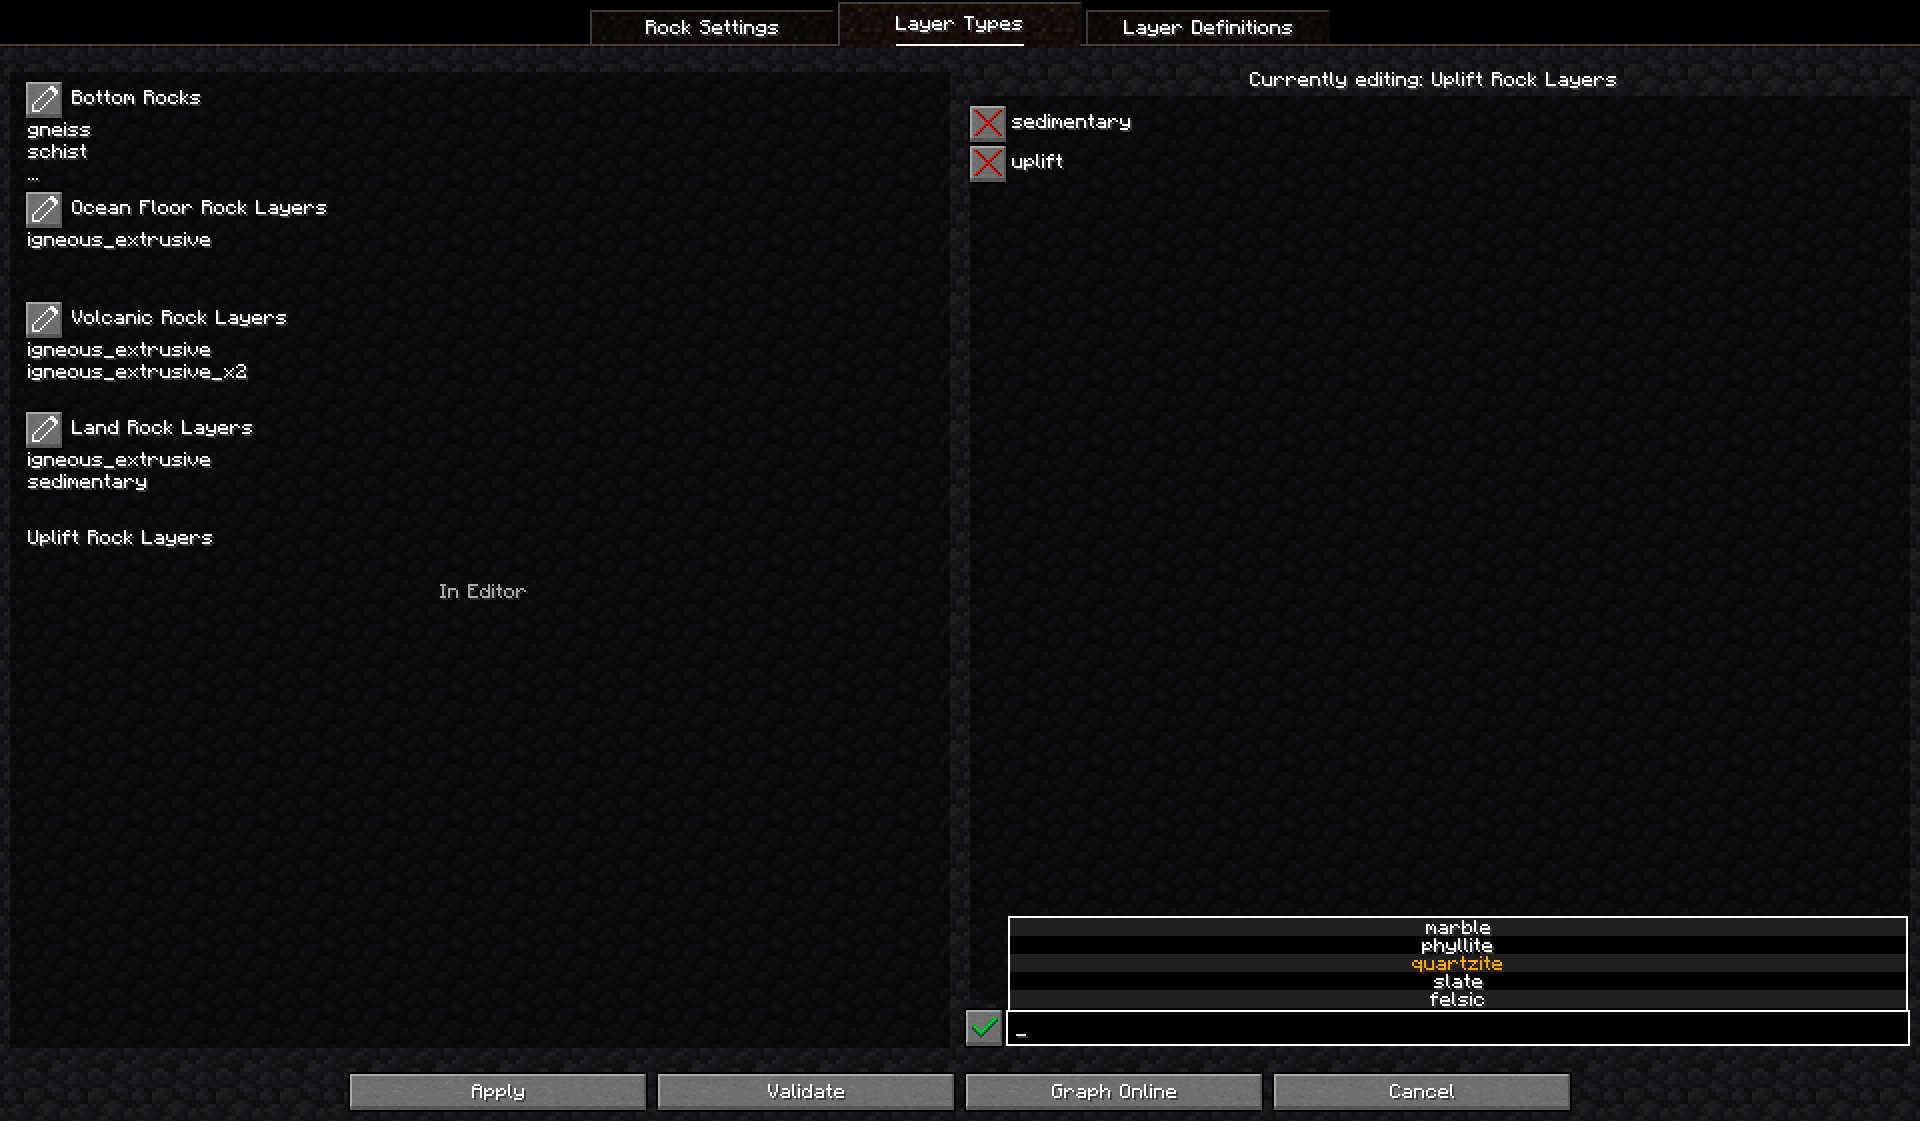
The editor contains a list of the values present in the layer type with, next to each, a delete button which removes that value. Towards the bottom of the screen there is an edit box which is used to add values. Next the edit box is a button which will add the value to the layer type currently in the editor.
When focused/selected, the edit box will also have a ‘scrollable’ list of values, which will show at most five values. The list can be scrolled with the up and down arrows and shift can be held to force the focused element to change when using the arrow keys. The value highlighted in gold is the currently selected value; using enter will autofill the selected value. Values already in the selected layer type will not be suggested.
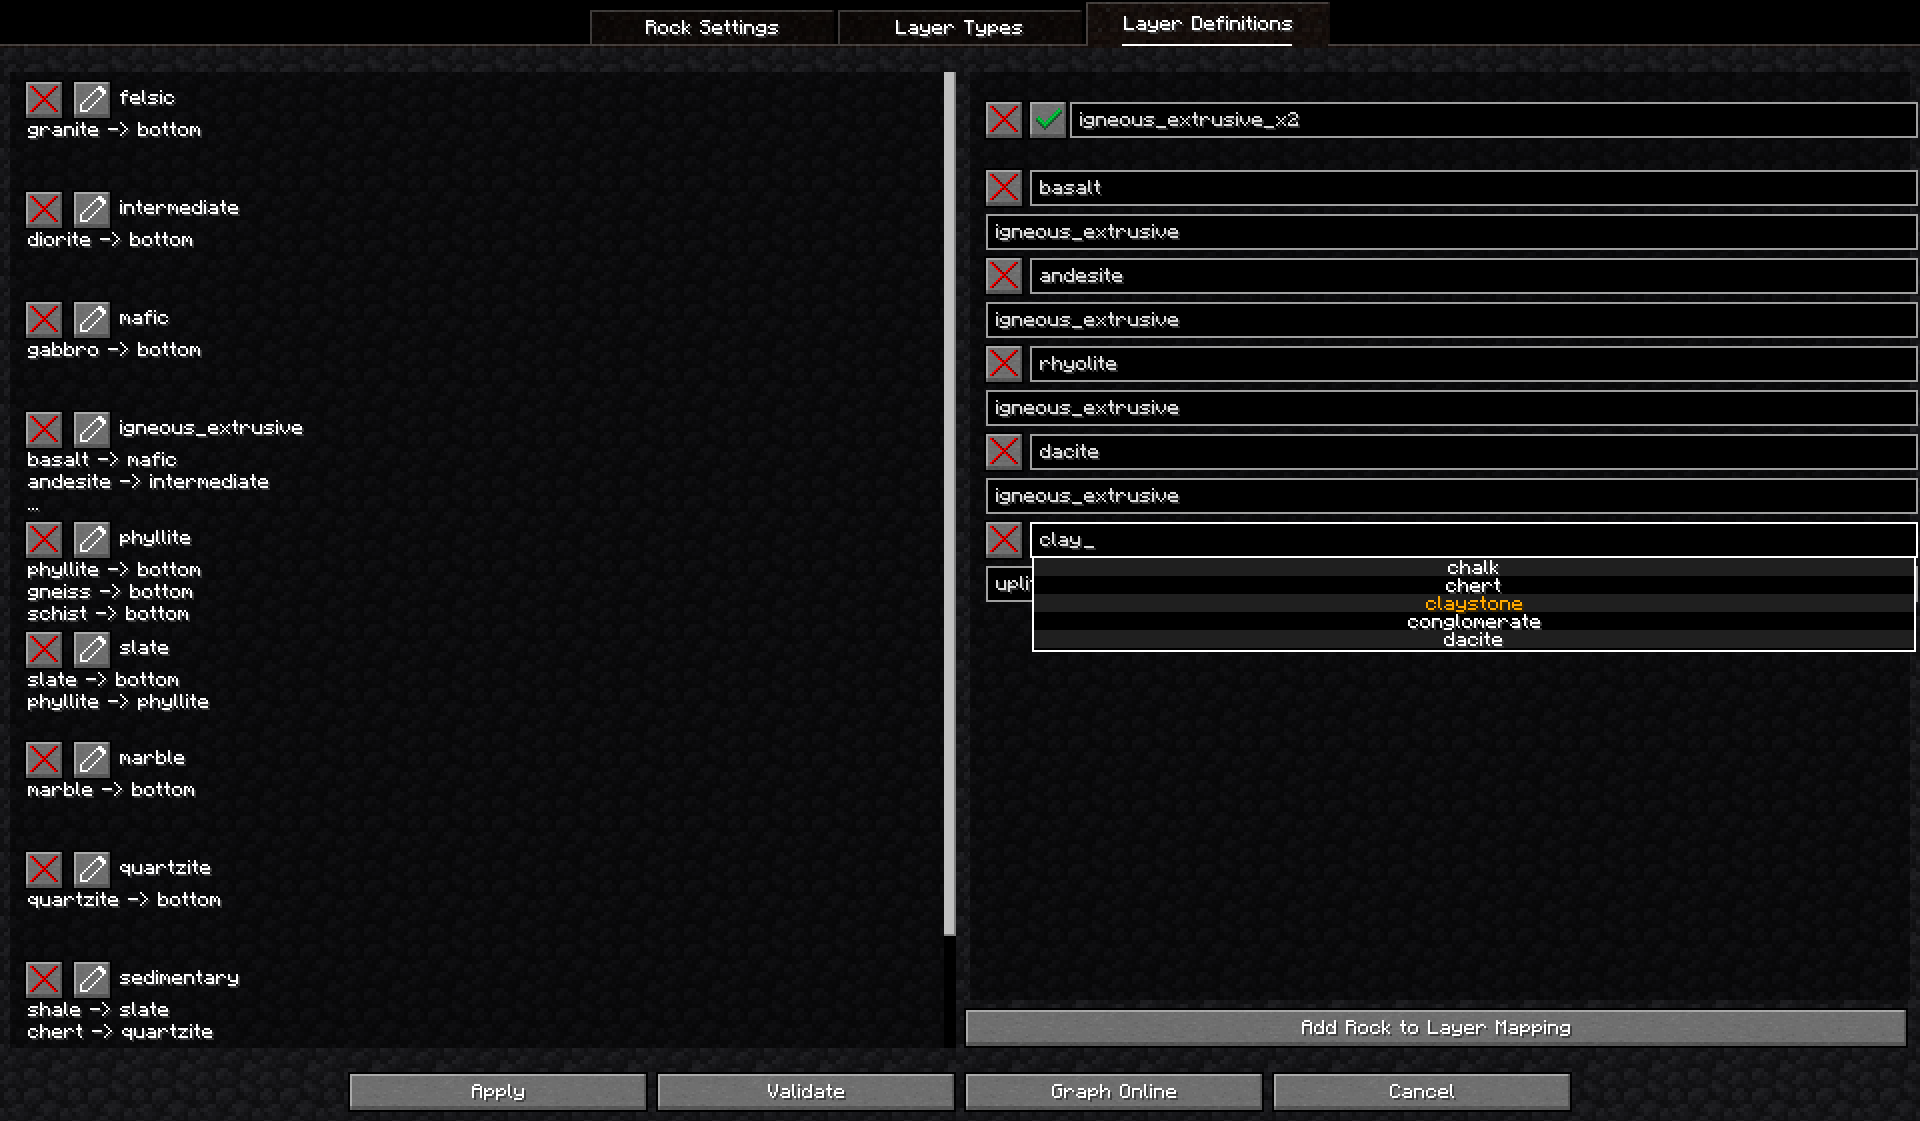
Layer Definitions
This tab is for editing, creating, and deleting layer definitions.
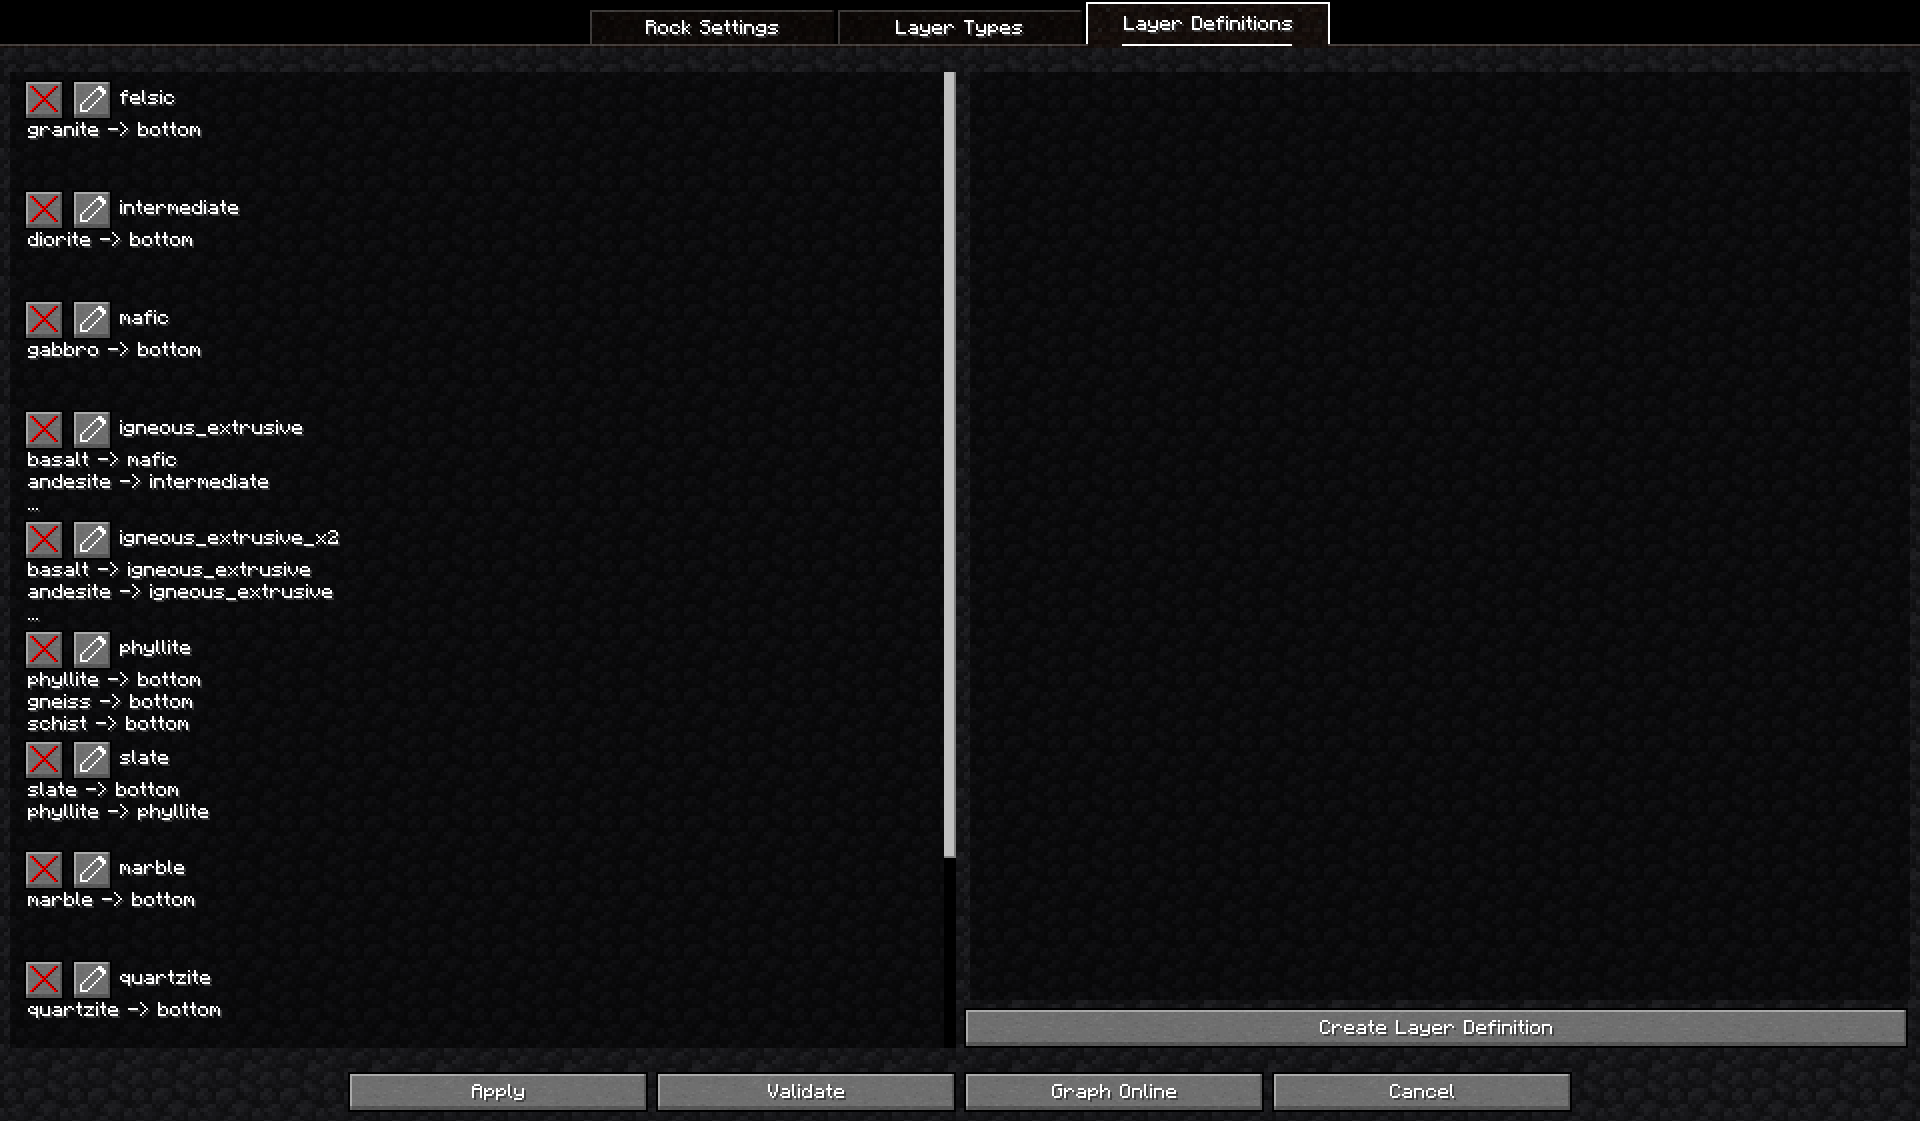
Each entry in the the display consists of
- A delete button: Removes the layer definition
- An edit button: Moves the layer definition to the editor
- The name of the layer definition
- A list of up to three rock settings to layer definition mappings. If there are more than three mappings, the third one will be replaced with an ellipsis.
The editor can be used to edit, create, and delete layer definitions. When the tab is first opened and after a layer definition in the editor is either moved to the display or deleted, the editor will be in an ‘uninitialized’ state.
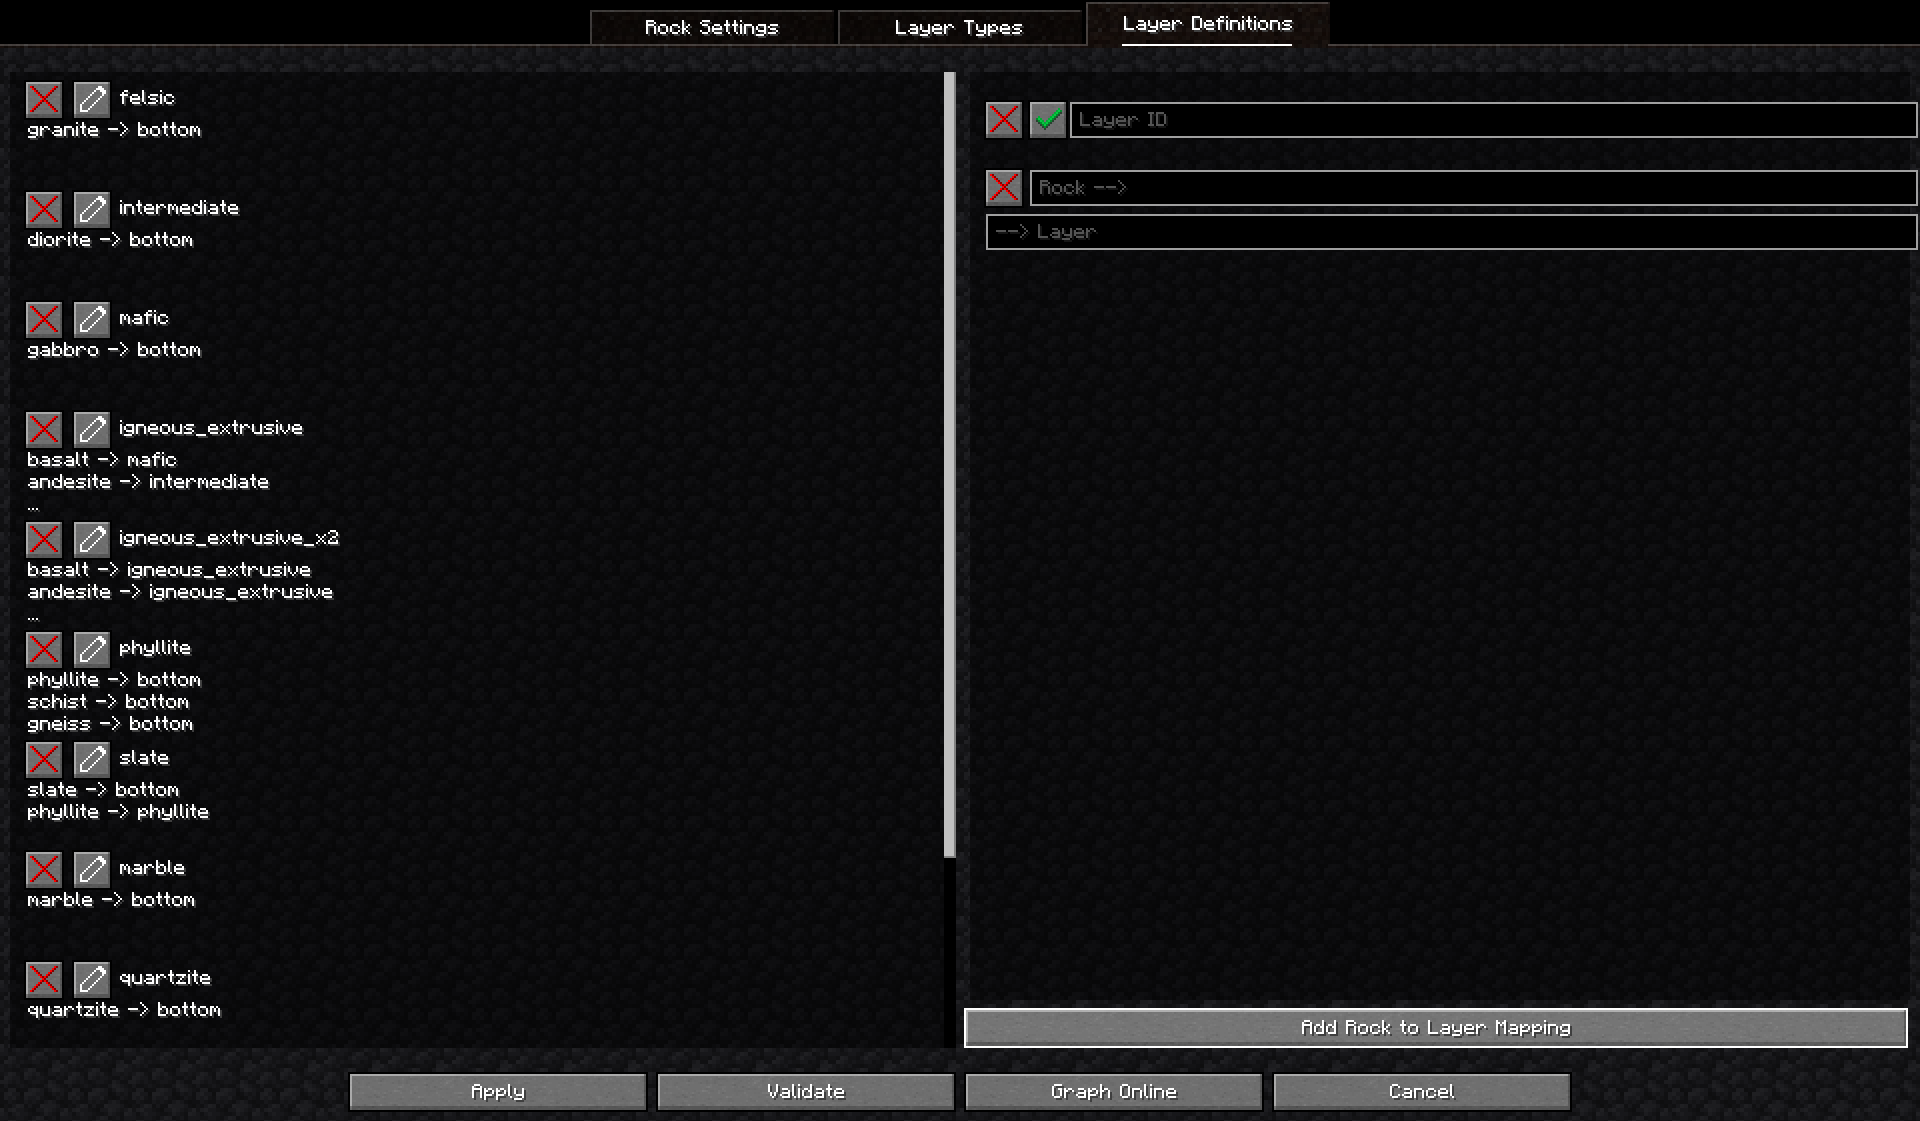
The editor can be ‘initialized’ by clicking the button labeled “Create Layer Definition” at the bottom or by moving a layer definition from the display. Once ‘initialized’, the editor consists of
- A layer id entry, which has
- A remove button: Deletes the layer definition currently in the editor and returns the editor to an ‘uninitialized’ state
- A confirm button: Moves the layer definition to the display and returns the editor to an ‘uninitialized’ state
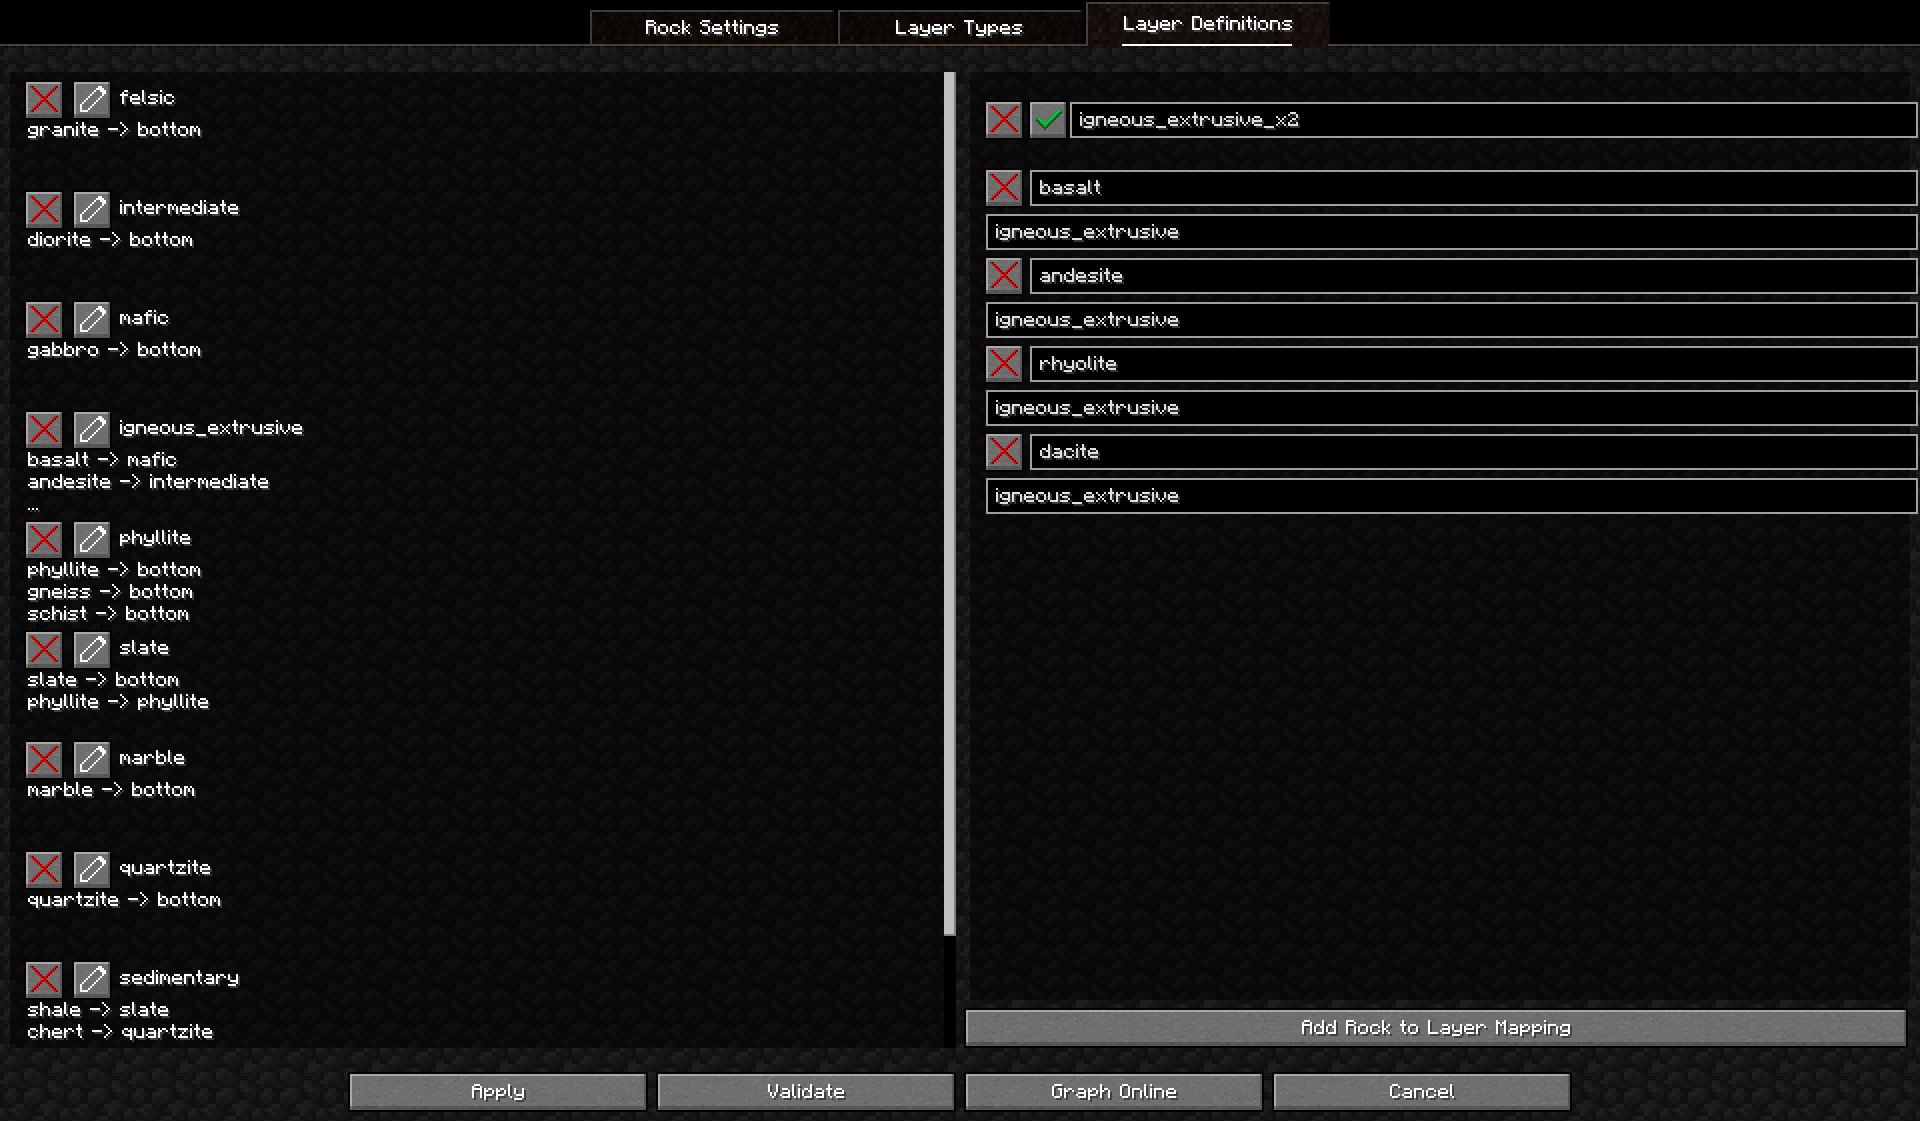
- An edit box where the id of the layer definition can be set
- One or more mapping entries, which have
- A remove button: Deletes that mapping
- An edit box which suggests rock settings. Defines the key of the mapping
- An edit box which suggests layer definitions. Defines the value of the mapping
Additional mapping entries can be added by clicking the button labeled “Add Rock to Layer Mapping” at the bottom.